Authentication With Json Web Token
Happy New Year 2023! I finally have time to write this post. And it’s the post, I am eager to write the most. Of all the resource in Safe stack, I found that authentication and authorization is the less well-known one.
Be it no more. In this post, I will show step by step how I create authentication with Jason Web Token (JWT) in Safe stack. The next post will be authorization.
Background#
To understand authentication, one needs to understand how all Component in Safe stack comes together. Safe stack consists of
- Saturn
- Azure
- Fable
- Elmish
Saturn is MVC web framework running on Giraffe and Kestrel (Asp.net Core). So it makes sense to use all functionality provided by the framework since we have 3 of them here. I found one very simple JWT sample code in Saturn source code (GitHub). Initially, we will follow this code in our CoCoTender work
Since I plan to show how authorization works in step-by-step fashion, it’s best to try in small step since it’s not easy (at least for me)
Our Steps#
- Learn how Safe Stack specifically Saturn works.
- Prevent all access to Saturn
- Create Login page and allow anyone to access it
- Create Authentication Api which anyone can access
- Allow access to other pages after user is authenticated
- Allow access to other Apis after user is authenticated
There a lot of steps to be done. So let’s start now.
Learn how it works#
There are 2 environment in Safe stack.
- Development
- Production
For production, all the request will be handled by the Web server (Saturn). But in development, things are different. Safe stack use webpack devserver as a proxy Web server. All the incoming traffic will go through the devserver before being forwarded to our Saturn code in Server.fs.
We can proove that by checking the Network Request in Chrome. Here is the one from our current implementation.
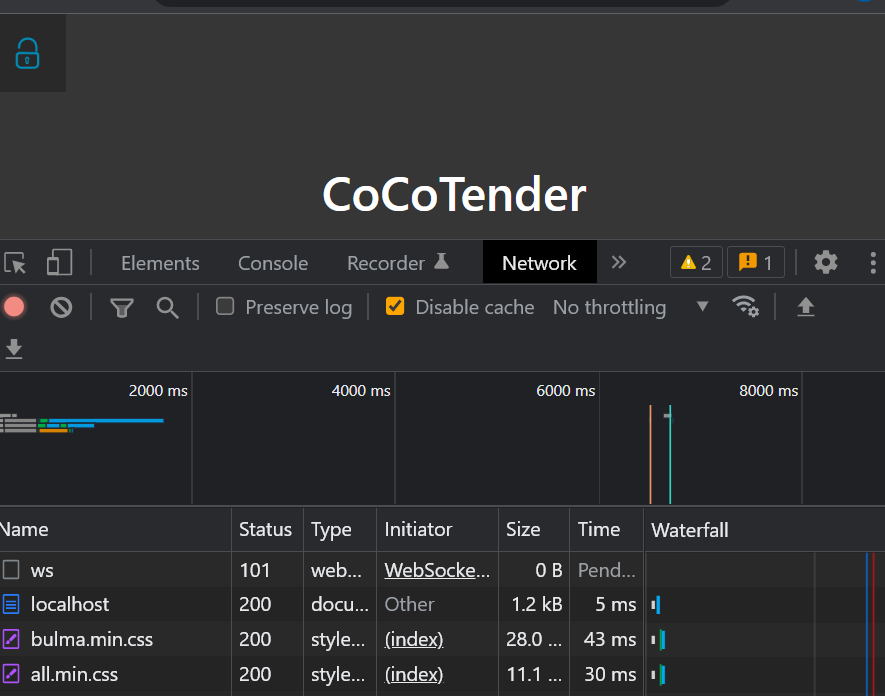
Chrome Network Request in the Beginning
It may not be obvious. But the network tab shows us that there is no Http request to get our index.html file from Saturn. This happens because webpack devserver does that for us.
But…, we want to control all the request through Saturn. The first step is to force the request to go through the webpack devserver and reach the Saturn.
Sound likes some kind of space journey 🚀 to me. :)
To change this webpack configuration, you need to change the webpack.config.js file. You will see this line:
    devServerProxy: {
        // redirect requests that start with /api/ to the server on port 5000
        '/api/**': {
            target: 'http://localhost:' + (process.env.SERVER_PROXY_PORT || '5000'),
            changeOrigin: true
        },
The aboved snippet tells us that only the request matching ‘/api/**’ will be forwarded to Saturn. We need to forward everything instead. Here is the change
    devServerProxy: {
        // redirect requests that start with /api/ to the server on port 5000
        '**': {
            target: 'http://localhost:' + (process.env.SERVER_PROXY_PORT || '5000'),
            changeOrigin: true
        },
If you look at the Network tab in Chrome again, you will see no change. So.. changing the devserver proxy is not enough. But wait, there seems to be some changes in the network request, if you scrolldown a bit, you will see there are 404 error when requesting favicon.png. So our change is working for favicon file but not the index html file.
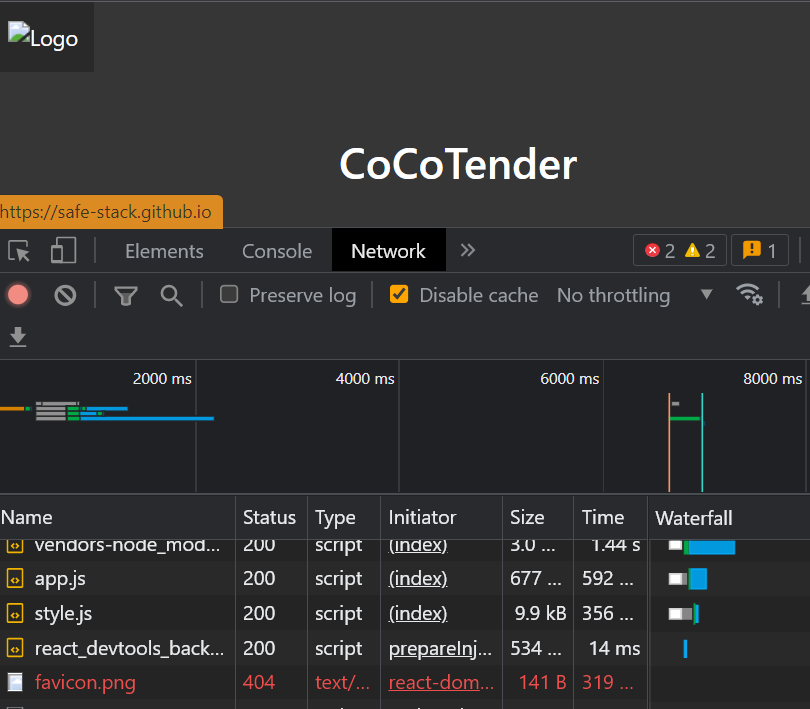
Chrome Network Request after Changing webserver proxy
The problem comes from the assumption of webpack devserver. It assumes that it should always serves the file with name (you guessed it) index.html. All we needs to do is rename the file to app.html and change all reference to that file.
- Rename from index.html to app.html
- Change all reference of index.html in webpack.config.js to app.html
Here is the result from console output:
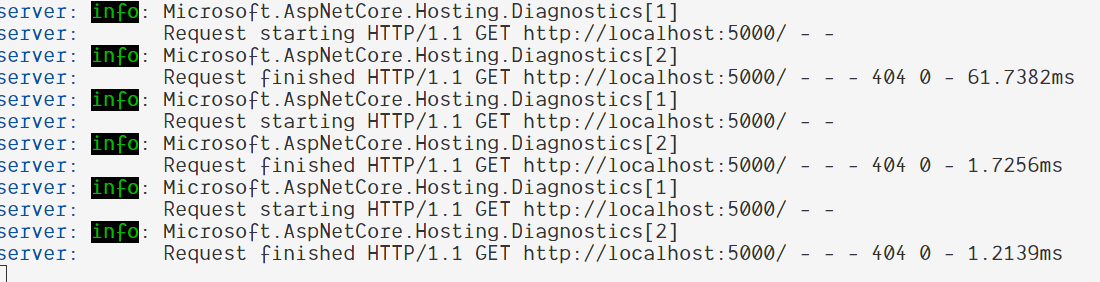
Console output after renaming index.html
It’s a bit better. You can see that all traffic has been forwarded to port 5000 which is the port for Saturn. But it does not return our app.html file because the Saturn does not knows about this. It’s time for us to do a bit of coding now.
Go to the bottom of Server.fs file. Here is the current application computation expression for our Server code.
let app =
    application {
        use_router webApp
        memory_cache
        use_static "public"
        use_gzip
    }
We will focus on what matters here first. The use_router is what we want to change because the router is used as a way to routing http request in Saturn app. Currently, it points to webApp which is a HttpHandle for our Api. (HttpHandle likes it name just the object that will serve the http request) We will change the router to explicitly serve our app.html file instead.
use_router (htmlFile "public/app.html")
Below log from console tells us that Saturn are trying to serve app.html file from our public directory. Since we do not provide that yet, the log will show file not found error.

Console showing App.html file is not found
We can simply copy app.html file from Client to Server public folder. Unfortunately, that’s not enough. Webpack will transplie all F# client-side file to JS and emit to Client output folder specified in webpack.config.js (outputDir). The webpack then will serve all application client-side file (html, js and css) from this output folder.
Since, we are going to serve everything from Server-side. We then need to change outputDir from ./src/Client/output to ./src/Server/public since we serves our new app.html from Server/public folder. This changes need to be done only in Development mode since it’s the only mode that running through webpack devserver. Setting this outputDir is not enough, we need to tell webpack that we want to write the output file to disk.
Here are all steps needs to be done:
- Change outputDir in Development mode. First, go to webpack.config.js and add following line at the top.
var isProduction = !process.argv.find(v => v.indexOf('webpack-dev-server') !== -1);
- Change outputDir to new Server/public when in Development mode.
outputDir: isProduction ? './deploy/public' : './src/Server/public',
- Enable writeToDisk in devServer
            devMiddleware: {
                writeToDisk: true,
            },
Finally, we could bring back the index page (now app.html) now. But if you look at the log, when go to BoQ page (http://localhost:8080/#/boq), you will see 404 error code when calling getBoQItems and getFactorInfo.
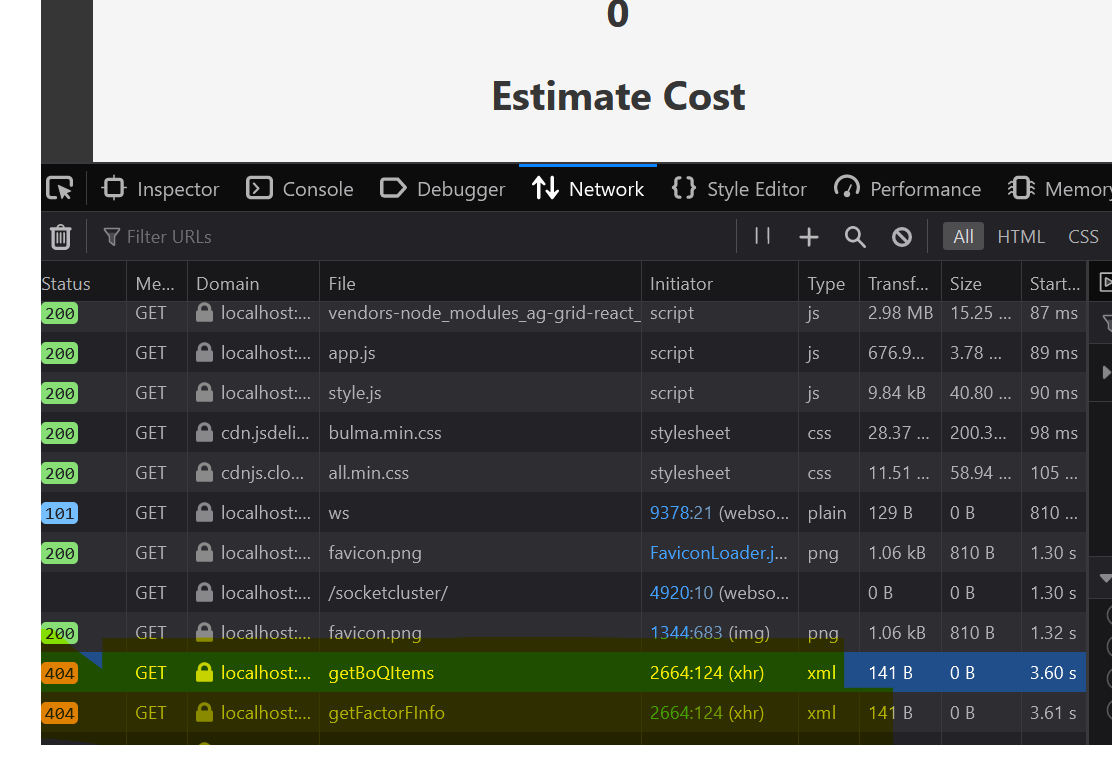
Could not call Api
A little bit more, we can then bring back our app to the working state. What we have done so far is to Get “/” request to app.html first. But we haven’t do anything for our api request. All api request will be in the form of /api/TypeName/MethodName. So all we have to do is forward all request having api prefix to our webApp HttpHandler.
Here is the change in Server.fs topRouter function:
let topRouter = router {
    get "/" (htmlFile "public/app.html")
    forward "/api" webApp
}
Then you will see that the api return data correctly this time. Next step is to prevent that.
Prevent all access to Saturn#
We will prevent all access to our Saturn web server by forcing all request to to through JWT authentication pipeline in our topRouter.
But before we can use use JWT authentication, we need to config it in our application first.
let secret = "<Your Secret>"
let issuer = "<Your Issuer url i.e. your.domain.com>"

let app =
    application {
        use_jwt_authentication secret issuer
        ...
    }
Then we will add our require authentication pipeline before all request in the router.
let topRouter = router {
    pipe_through (Auth.requireAuthentication JWT)
    ...
}
When we see the result in Chrome network tab, you will see that it return 401 code which means UnAuthorized error. This means that our Saturn knows that this request is not authenticated and return such error.
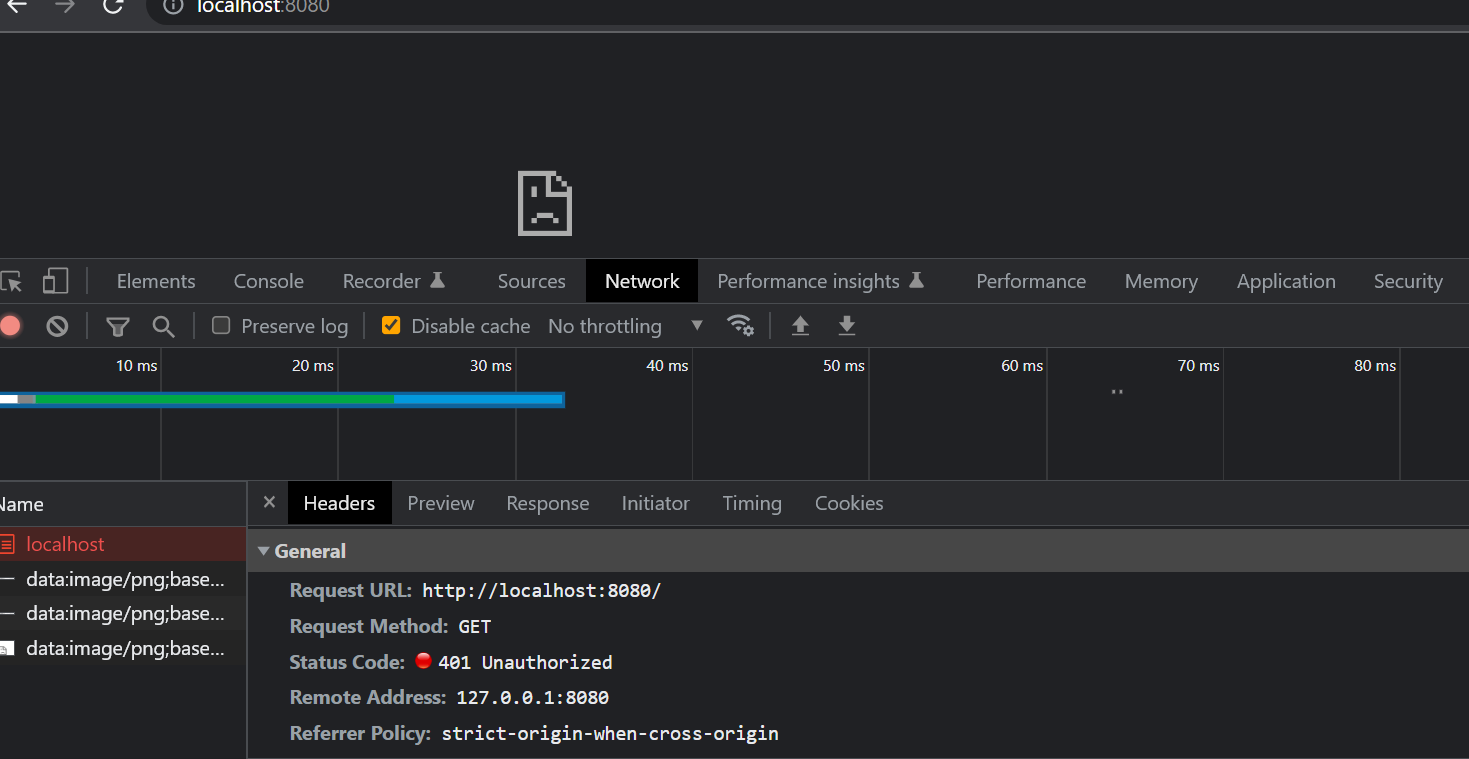
Unauthorized Access for All Web Requests
We could prevent all our application now. Next step is to allow only authenticated request.
Make Authenticated Request#
We can get authenticated request by supplying all our http request with JWT (Jason Web Token). The token can be request from the server. Usually the step will be done like this:
- User get token by supplying username and password.
- The server will verify that user and password is correct and send back the Token to client.
- From now on, the client will use the token in all Http request header. We will call this authenticated request.
- When the server receive the authenticated request, it will let the request pass through the pipeline.
Let’s start by create function to generate token below in file Server.fs:
let generateToken email =
    let claims = [|
        Claim(JwtRegisteredClaimNames.Sub, email);
        Claim(JwtRegisteredClaimNames.Jti, Guid.NewGuid().ToString()) |]
    claims
    |> Auth.generateJWT (secret, SecurityAlgorithms.HmacSha256) issuer (DateTime.UtcNow.AddHours(1.0))
All of this required Identity package which can be installed in Paket as follow:
dotnet paket add System.IdentityModel.Tokens.Jwt --version 6.25.1 -p Server
The function will create Claim using supplied email. Claim is like identity for user of the token. From now on, when request comes with token, the Api can get the identity (email) from the token.
The function aboved create JWT token with valid time of 1 hour. After one hour passed, the token will be expired. The client need to refresh the token to extend the session period. I did try that in our scratch.fsx files and it is working fine.
Next, we need to let the client use this generate token function. Let’s create new Api for this authentication purpose
Go to shared.fs and add new Api interface as follow:
type Token = Token of string

type IAuthApi =
    { login: string*string -> Async<Token> }
Then implement the login function in Server.fs:
let authApi = {
    login =
        fun (email, password) ->
            async {
                if (password = "ok") then
                    return (generateToken email)
                else
                    return (failwith "Login Failed")
            }
}
We just check if the password is ok before return new token. Otherwise, we just raise the error.
Next, we just need to allow any users to use this api. Let’s call this anonymousApi.
let anonymousApi : HttpHandler =
    Remoting.createApi ()
    |> Remoting.fromValue authApi
    |> Remoting.buildHttpHandler
Then, create securedApi that will simply call our business logic Api:
let securedApi  =
    Remoting.createApi ()
    |> Remoting.fromValue (cocoTenderApi (LiteDBStorage()))
    |> Remoting.buildHttpHandler
Now, merge both Api into complete Api:
let completeApi : HttpHandler = choose [
    anonymousApi
    pipeline {
        requires_authentication (Giraffe.Auth.challenge "JWT")
        plug securedApi
    }
]
As you can see, anyone can access anonymouse Api but only authenticated request can call secured api.
Finally, just plug the completeApi to the Router:
let topRoute = router {
    get "/" (htmlFile "public/app.html")
    forward "/api" completeApi
}
We remove the line pipe_through (Auth.requireAuthentication JWT) because it has moved to the completeApi now.
Let’s create our Login page so that user can perform login to the UI.
Go to Pages folder in Client project and create Login.fs file.
Start by creating Model for our Login page: We will store Email and Password in our Model before submitting to our Authentication api.
type Model =
    {
        Email : string
        Password : string
    }
Our Msg will be just for Login purpose. We will have actual Login Msgs and Msgs related to updating login parameter as follow:
type Msg =
    | UpdateEmail of email:string
    | UpdatePassword of password:string
    | Login
    | LoggedIn of Result<Token, string>
    | GotError of exn
We will call our authentication Api here. So we need to create api proxy on the client-side like what we did with CoCoTenderApi one.
let authApi =
    Remoting.createApi ()
    |> Remoting.withRouteBuilder Route.builder
    |> Remoting.buildProxy<IAuthApi>
Start with init function. We will make the Email and Password blank in the beginning.
let init () : Model * Cmd<Msg> =
    let model = { Email = ""; Password = "" }
    model, Cmd.none
Then, the update function we will handle the Msg as follow:
    let update (msg: Msg) (model: Model) : Model * Cmd<Msg> =
    let showError' = showError model

    match msg with
    | UpdateEmail email ->
        { model with Email = email }, Cmd.none

    | UpdatePassword pwd ->
        { model with Password = pwd }, Cmd.none

    | Login ->
        printf "Loggin In"
        let cmd = Cmd.OfAsync.either authApi.login (model.Email, model.Password) LoggedIn GotError
        model, cmd

    | LoggedIn (Ok (Token token)) ->
        printf $"Token {token}"
        model, cmd

    | LoggedIn (Error msg) ->
        showError' msg

    | GotError ex ->
        printf $"LoggedIn Error {ex.Message}"
        showError' msg
        model, Cmd.none
The aboved code will return token when the login is success. Next is to show UI for our Login page.
let view' (model: Model) (dispatch: Msg -> unit) =
    Bulma.hero [
        hero.isFullHeight
        color.isPrimary
        prop.children [
            Bulma.heroBody [
                Bulma.container [
                    Bulma.column [
                        column.is6
                        column.isOffset3
                        prop.children [
                            Bulma.field.div [
                                Bulma.label "Email"
                                Bulma.control.div [
                                    Bulma.input.text [
                                        prop.value model.Email
                                        prop.placeholder "a@b.com"
                                        prop.onChange (fun (email:string) ->  email |> UpdateEmail |> dispatch)
                                    ]
                                ]
                            ]
                            Bulma.field.div [
                                Bulma.label "Password"
                                Bulma.control.div [
                                    Bulma.input.password [
                                        prop.value model.Password
                                        prop.placeholder "*****"
                                        prop.onChange (fun (pwd:string) ->  pwd |> UpdatePassword |> dispatch)
                                    ]
                                ]
                            ]
                            Bulma.field.div [
                                Bulma.field.isGrouped
                                Bulma.field.isGroupedCentered
                                prop.children [
                                    Bulma.control.div [
                                        Bulma.button.button [
                                            Bulma.color.isLink
                                            prop.text "Login"
                                            prop.onClick (fun _ -> dispatch Login)
                                        ]
                                    ]
                                ]
                            ]

                        ]
                    ]
                ]
            ]
        ]
    ]


open Feliz.UseElmish

let view = React.functionComponent(fun () ->
    let (model: Model), dispatch = React.useElmish(init, update, [| |])

    view' model dispatch
)
We have the code for login page in place, we need to render the page in Index.fs. First, go to Router.fs to create Login page type.
type Page =
    | Login
    | Home
    | BoQ

let parseUrl = function
    | [ ] -> Login
    | [ "boq" ] -> BoQ
    | [ "login" ] -> Login
    | _ -> Login
As you can see, be default we will map path to Login page where there is no custom Url path specified.
Now go to Index.fs to do actual rendering in view function:
    let activePage =
        match model.CurrentPage with
        | Login -> Pages.Login.view()
        | Home -> Pages.Home.view()
        | BoQ -> Pages.BoQ.view()

        |> viewPage model dispatch
Now, if you run the project and it will show the Login page. Entering user with some test email with password being ‘ok’, You will get following result:
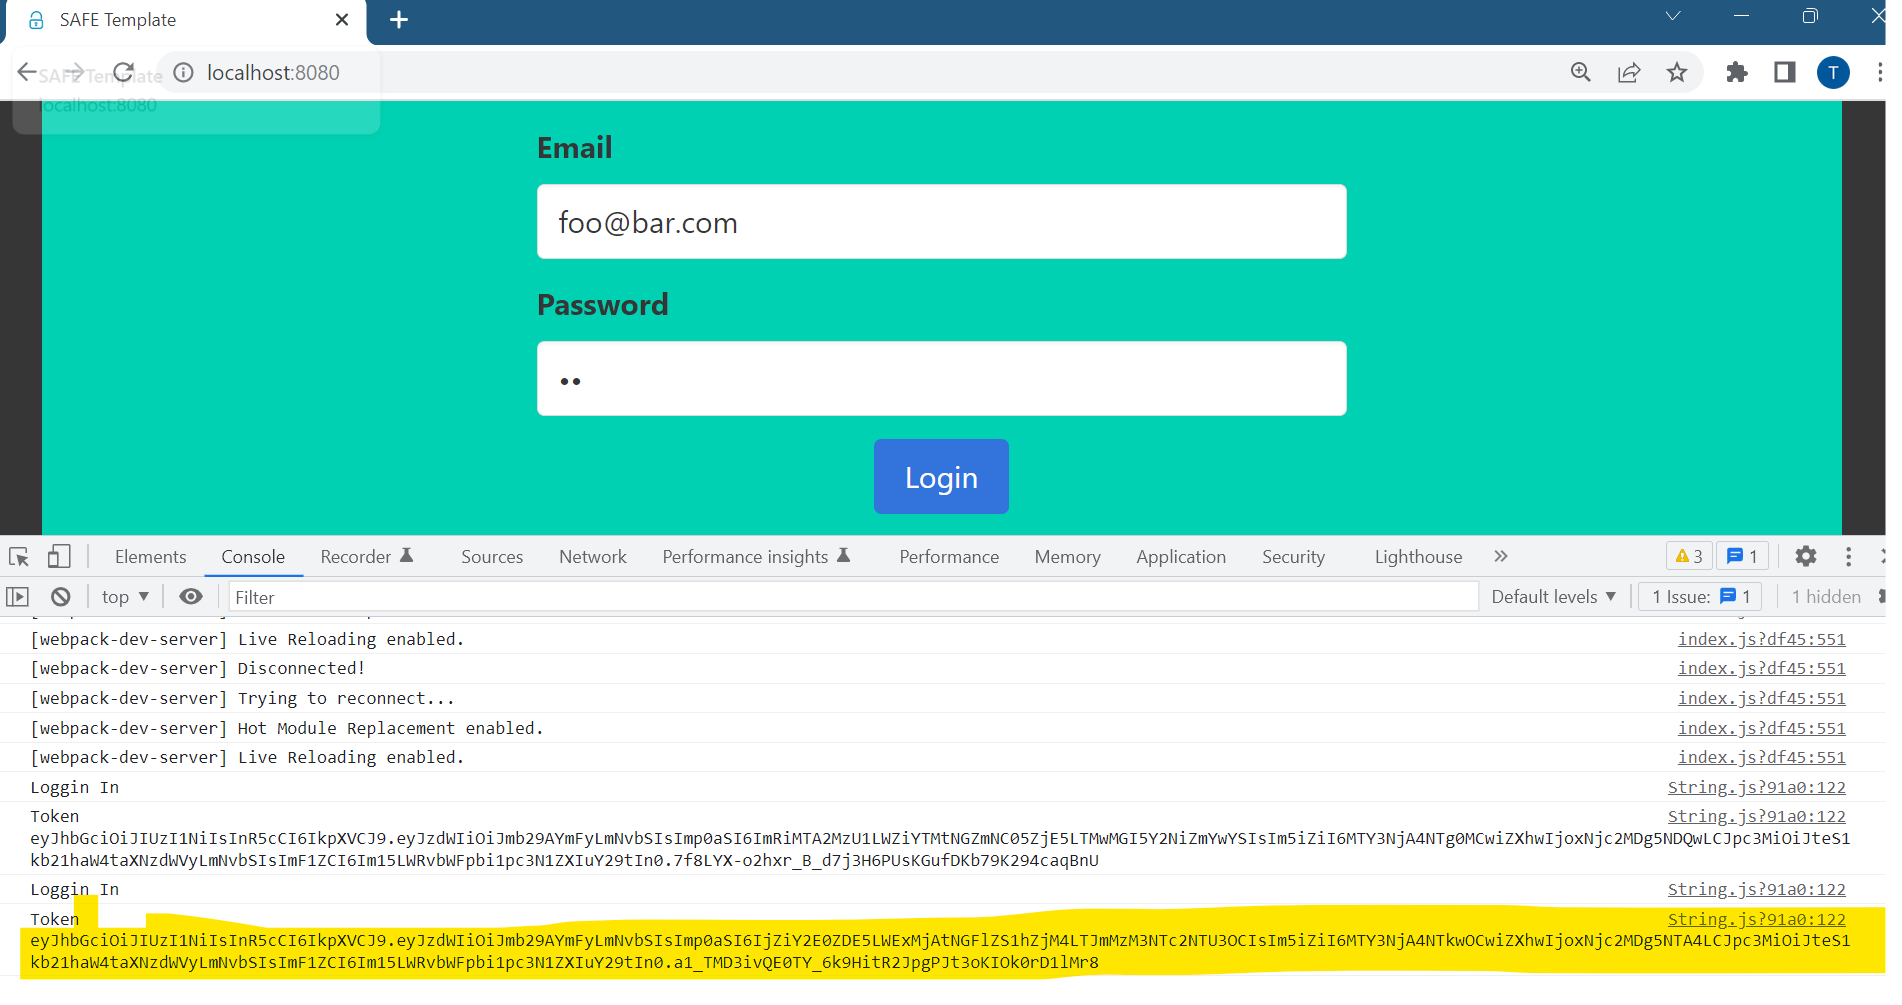
Show returning token in Console after successful logged in
Now, it is a good time to define how to prevent client to browse to any pages. After looking at sample in Saturn repository, I decide to go with securing the route. Basically, we will create route secured which we allow only authenticate request. You just need to add 2 more blocks in the Server.fs file
// ... After authApi definition
let securedRouter = router {
    pipe_through (Auth.requireAuthentication JWT)
}

// ... Replace topRouter
let topRouter = router {
    get "/" (htmlFile "public/app.html")
    forward "/secured" securedRouter
    forward "/api" completeApi
}
After finish login, the client need to redirect to secured page with returning JWT token. There are quite a few steps involved. I will list all of them here. And show the code one by one..
- After successfully login, keep the JWT token in local storage.
- Navigate to secured page
- I am just kidding. There’s no steps 3.
To re-used JWT token in later request, we need to keep in some persistance storage. I pick local storage in Web browser since it’s all supported and there are lots of sample using it. Create the TokentStorage.fs with following code.
module TokenStorage

open System
open Fable.Import

let private storageKey = "token"

let tryGetToken () : string option =
    Browser.WebStorage.localStorage.getItem(storageKey)
    |> (function null -> None | x -> Some (unbox x))
    |> Option.bind (fun x -> if String.IsNullOrWhiteSpace(x) then None else Some x)

let removeToken () = Browser.WebStorage.localStorage.removeItem(storageKey)

let setToken (token:string) =
    if String.IsNullOrWhiteSpace(token) then removeToken()
    else Browser.WebStorage.localStorage.setItem(storageKey, token)
This module will allow us to get and set token. We will use setToken just for now.
Before that don’t forget to add this TokenStorage.fs in Client.fsproj. It should be at the top right below
index.html since all Page need to use it.
Next go to Login.fs and update login flow as follow:
    | LoggedIn (Ok (Token token)) ->
        printf $"Token {token}"
        TokenStorage.setToken token
        let cmd = Cmd.navigatePath( [|"secured"|])
        model, cmd
We will navigate the path to secured. if you run now the browser will show something like http://localhost.8080/#secured which is not matched with the secured we defined in Saturn. Since by default Saturn use hash navigation which we don’t want. We need to change Router as well. Go to Index.fs and change the router to use pathMode instead of the default hashMode.
    React.router [
        router.pathMode
        router.onUrlChanged (parseUrl >> UrlChanged >> dispatch)
        router.children [ activePage ]
    ]
Now if you login again, you should see same old BoQ page waiting for us.
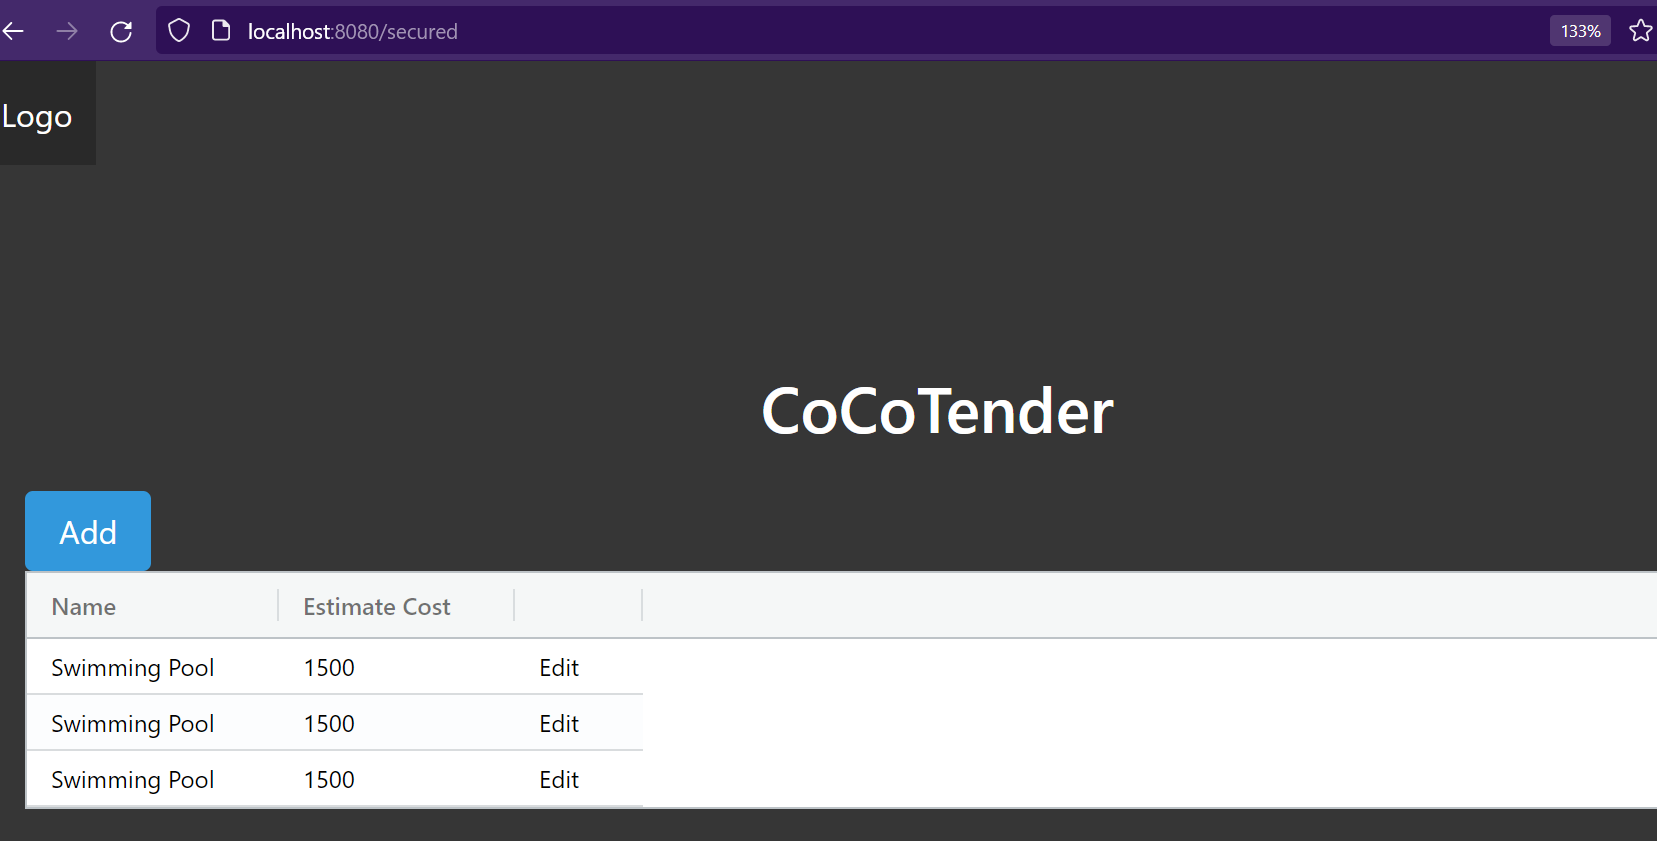
Go to Secured page after Logged In
Next, we will learn how to authorize each user. Such that only owner of the BoQ can work on it.
Credit#
- Saturn JWT example
- Ryan Palmer article